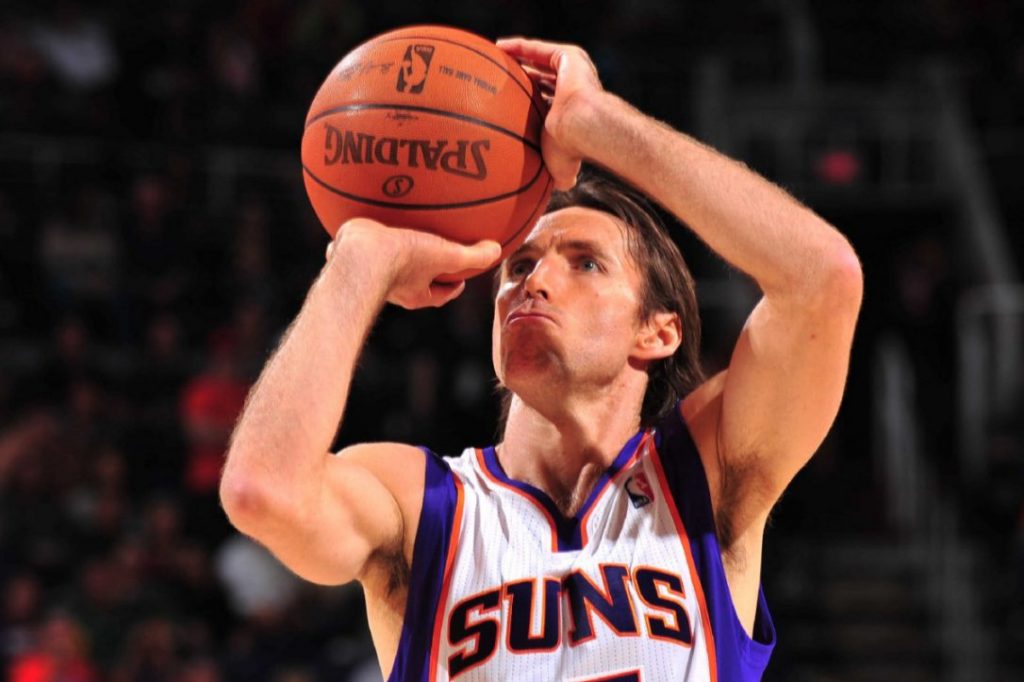
This game has always been, and will always be, about buckets.
Even though the above quote is from a Pepsi TV commercial, it is one of truest statements in basketball.
In my opinion, shooting has always been the most important skill in basketball. Dribbling, passing, defense, rebounding, etc., are all necessary of course, but if you can’t shoot, then you can’t score…and you can’t win.
This fact is more and more evident in today’s game. Guys like Steph Curry, Klay Thompson, Kevin Durant, Damian Lillard, Bradley Beal, etc., have made people realize the power of great shooters. Now, even big men must be able to shoot the ball to be considered top players (e.g. Anthony Davis, Joel Embiid, Nikola Jokic).
For me personally though, the most important reason to learn how to shoot is this:
Being able to shoot makes the game a lot more fun. 🙂
This step by step guide will help new players and remind the old about the fundamentals of shooting a basketball.
How to shoot a basketball step-by-step
When reading this guide, remember that everyone’s body is slightly different — hand size, arm length, body proportions, strength, etc. This means that each person’s shot will also look slightly different. The greatest shooters in history — Steph Curry, Klay Thompson, Ray Allen, Steve Nash, Reggie Miller — all have very different looking shots, so don’t worry if yours does not look the same. Focus instead on the fundamentals that make a great shooter.
1. The Hands
Two things are important when talking about the hands.
The first thing to know is that we only shoot the ball with one hand / one arm (usually your dominant hand). Your other hand (i.e. guide hand or off-hand) is only used to hold the ball steady as you shoot. Using one hand gives you more consistent aim, and control than a two-handed shot.
The second thing to know is the proper position of your hands on the ball, and the ball on your hands. Read on below!
Proper Hand Position
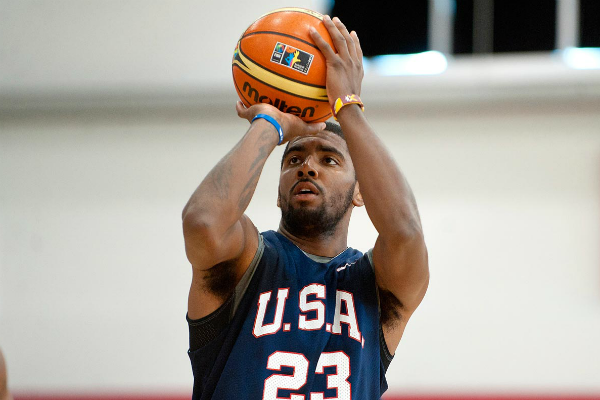
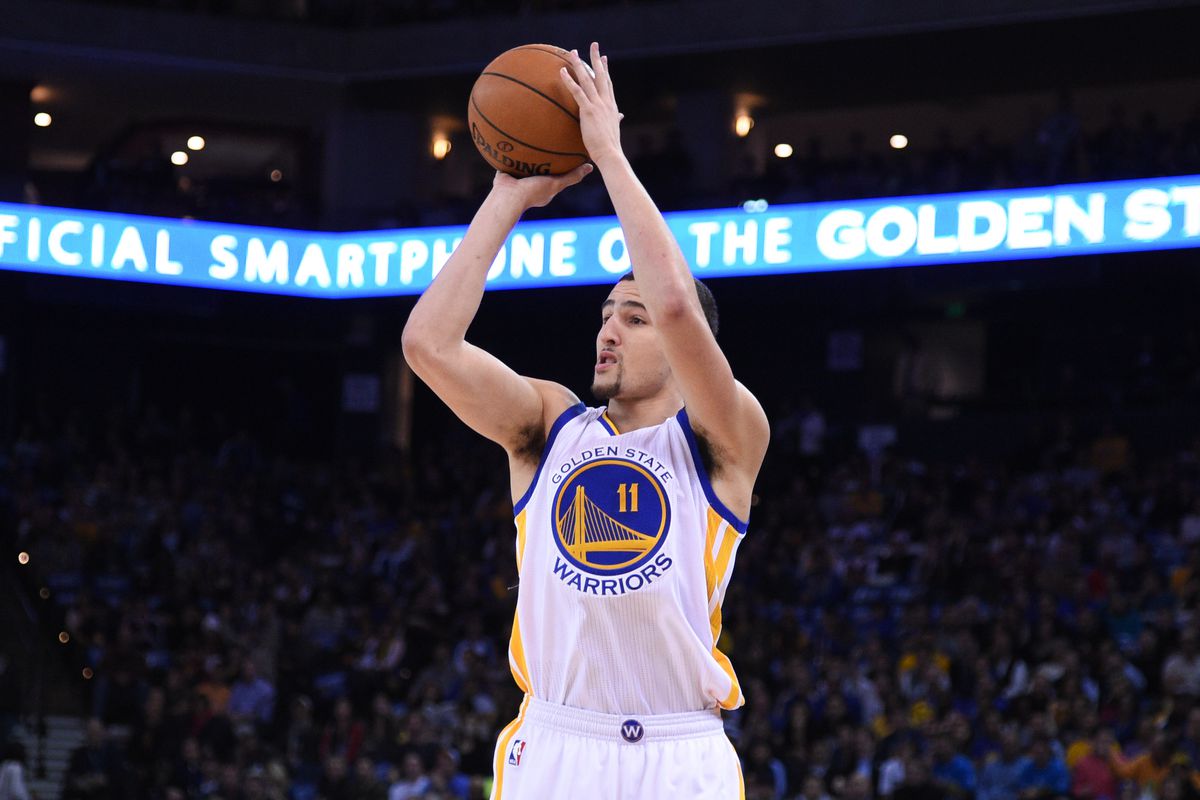
Place your shooting hand directly under the ball, and your other hand (i.e. guide hand) to the side as Kyrie Irving is doing above. This is your basic hand positions when shooting.
Make sure your fingers are spread out as much as possible, but not stretched to the extent that you feel tension in your hands.
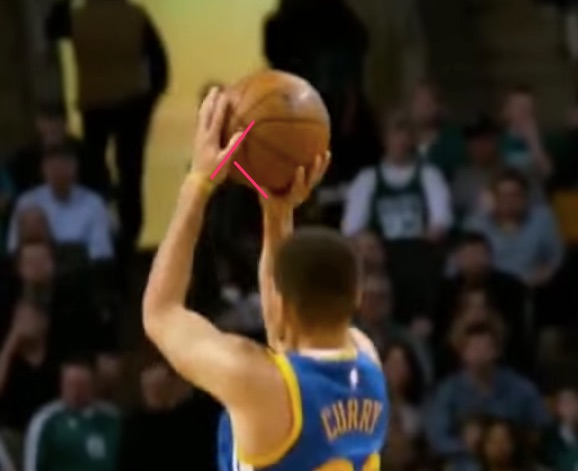
The thumbs of your hands should form an imaginary “T” with each other (but not touching). It does not need to be a perfect T, and some people may see their hands in more of a “W” shape. See Steph Curry below:
Quick tip: To find the proper position of your shooting hand, place your index finger on the air hole of the basketball. Some people prefer placing their middle finger on the air hole or somewhere in between. You will find what works best for you when you start practicing shooting.
Ball position on hands
The weight of the ball should mainly be on your fingers and finger tips. This ensures a nice release and backspin when shooting. The ball should not touch your palm at all when releasing your shot, as you will lose spin and trajectory.
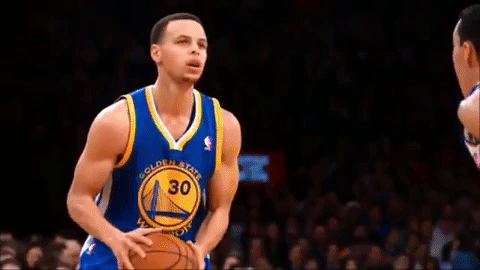
Some coaches go a step further, and say that the ball should never, ever touch your palm when shooting. This is good practice, but not entirely necessary. When setting up, and raising into your shot, it is fine to have the ball touch your palm. The most important thing is to have the ball come off your fingertips when releasing the ball, and not your palm. See Steph Curry video below as a good example.
2. Arm Position and Movement – The 90 degree rule
Now that we know how to hold the ball, lets go over the basic shooting arm position, with special attention on the elbow and wrist angles.
First, lets look at this GIF of Ray Allen’s beautiful shooting form.
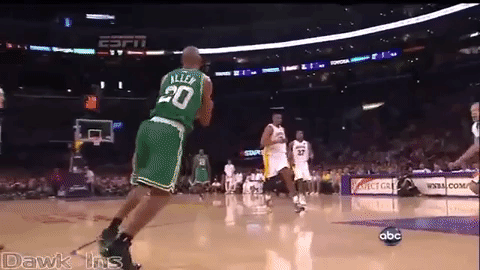
Now, let’s break it down to into the shooting fundamentals.
a) Both hands are holding the ball in proper shooting position (thumbs forming imaginary “T”), as explained in part 1 of this article. The ball starts near the waist.
b) The angle between the forearm and the upper arm (i.e your elbow), should be bent to approximately 90 degrees.
c) The ball is then raised to near the forehead, or until your upper arm is at a 90 degrees to your body. As you raise the ball up, keep your elbow at 90 degrees the entire time. Don’t cock your forearm back any further (i.e. don’t decrease your elbow angle as you go up). It’s tempting, but don’t do it. You will lose control, and accuracy.
d) Right before you begin to release the ball, the angle between your upper arm and hand (i.e.your wrist) should be bent at 90 degrees towards you.
At this point, we are at the magical 90-90-90 position. Your upper arm is 90 degrees to your body; your upper arm and forearm form a 90 degrees angle; your forearm and wrist form a 90 degree angle.
e) In one motion, extend your arm upwards at 45-50 degree angle, and flick your wrist downwards to release the ball. Remember to release the ball off your fingertips, not your palm! It should feel like the ball is mainly coming off your first two or three fingers (index, middle, ring).
Flicking your wrist and releasing off your fingertips will give the ball backspin. This gives the ball a better chance of going in if its hits the rim or backboard. Also known as “shooter’s touch”, or “shooter’s roll”.
f) After you release the ball, hold your shooting arm and guide hand in the final position. This is called follow-through. Your shooting arm should be basically in line with the basket. If not, then you probably didn’t shoot straight. Practicing holding your follow-through will help you learn your mistakes, and build a more consistent shot.
g) When finishing your shot, the elbow of your shooting arm should be around your eye level, or just above your eye. This means you shot the ball with enough arc. Shooting with too much arc will make it more difficult to aim. Shooting with too little arc will give you a much smaller chance of going in, even if aimed straight. The perfect shooting arc depends on your height, shot speed, distance from basket, and other factors.
If you are really interested in finding your perfect shooting angle/arc, you can check out this scientific study by Dr. Frank K. Lin. Or, you can just practice until you find yours.
3. How to Aim – Finding Your Shot Line
The most important thing when learning to shoot, is the ability to shoot straight. Once you can consistently shoot straight, you just need to adjust your power and arc. This is relatively easy to fix. If you are consistently missing left or right, there is something fundamentally wrong with your aim and form. So, how do you shoot straight?
The most important thing to learn is the ability to shoot straight.
a) The first step to shooting straight is to find your dominant eye. This is the eye you will aim with. People are either left-eye dominant or right-eye dominant.
To find your dominant eye, choose a target about 20-30 feet away — if you are on a basketball court, just stand at the 3-point line, and use the hoop as a target. Make a circle with your hands and put the target in the middle of the circle. First, close your left eye. If the target jumps out of view, then you are left eye dominant. If the target does not move, then you are right eye dominant. See the video below for visual explanation.
b) Create your shot line.
If you are right handed, and right-eye dominant, line the hoop up with your right eye. Since you need your right eye to aim, your shot line will be just to the right of your right eye, or in line with your shoulder.
If you are right handed, and left-eye dominant (like me), your shot line will move slightly more towards the center of your body / face. You can try lining the hoop up with your nose. The ball should completely cover your entire right eye as you raise up through your shooting motion.
Nobody is 100% right or left-eye dominant, so everyone’s optimal shot line will vary slightly.
c) When shooting, the ball should move straight up your shot line. The ball should start on your shot line, move up your shot line, and finish on your shot line (hopefully in the basket).
Your head should also not move when shooting. This ensures you shoot straight consistently. After some practice, you should be able to shoot straight 80% of the time. If you find yourself adjusting / twisting your head for aim while shooting, then it probably means you have chosen the wrong dominant eye/shot line.
A cool experiment to try is to close one of your eyes and shoot. If you are left eyed dominant, close your left eye, and try aiming with only your right eye — you will find it very difficult to shoot straight!
Note: You need two eyes open to better judge distances (i.e. triangulate).
4. The Shoulders and Feet
I find that the optimal position of the shoulder and feet really differ per player. It depends a lot on each individuals body, shot line, and individual preferences.
a) Stance
Your feet should be approximately shoulder width apart, or a bit wider. This makes sure you are balanced, and allows you to jump effectively. Too narrow, and you will find it hard to balance, especially if you are shooting off the move. Too wide, and you will find it difficult to jump.
Your dominant foot should also be slightly in front of your other foot. So, if you shoot with your right hand, then your right foot will be slightly in front of your left foot.
b) Angle of feet and shoulders
Old school coaches say that the shoulder and feet should always be squared and pointed towards the basket when shooting. This is true for some players, but wrong for many. It tends to works very well for granny shots.
For most players, it is better, and more natural, to have their feet at a bit of an angle when shooting. If you are right handed, your feet will angle a bit to the left. Since you shoot with only one arm, it makes sense for the body to be turned a bit so that your shooting shoulder/arm/hand is directed towards the basket. I think it also has a lot to do with eye-dominance. I find that cross-eyed shooters (i.e. left eye dominant / right handed) will have a more pronounced angle. This helps put their shot line in line with the basket without the need to adjust head position. Right hand/right-eyed shooters will tend to more square, but still have a slight angle.
Many people will start with their feet pointed straight, then twist a bit in the air as they shoot and finish with their feet at an angle. The body will naturally turn as the shooting arm extends towards the basket to relieve tension.
You will need to experiment a bit to see what works best for you. Whatever feet angle you choose, the most important thing is still for the ball to follow your shot line as mentioned in the previous section. Allow your feet and shoulder to naturally follow. Often, in the midst of action, you will not have time to get exact footing anyways.
5. Using your legs, and putting it all together
We now know how to hold the ball, position/move our arms, aim the ball, and angle our feet/shoulders. Finally, it’s time to add our legs into the equation, and put it all together into one fluid shot motion.
We will use the same Ray Allen video example as in Part 2 (arm position and movement). This time, let’s focus on the legs.
a) As you load your shot, and bring the ball down near your waist, your knees should also bend down preparing to jump.
b) As the ball progresses up through your shot line, you should extend your legs upwards at the same rate. Try to jump straight up and down as much as possible, not backwards or forwards.
c) Optimally, the ball should be released just as your reach the peak of your jump. If you did not actually jump in the air (i.e. shooting a free throw, or set shot), then the ball should be released just as your legs reach full extension, and you are on your toes.
Don’t release the ball as you are coming down, or you will lose a lot of power, and overcompensate by trying to use strength in your arms which will throw off your shot.
You also do not need to try to jump as high as possible when shooting. Ray Allen jumps quite high on his shot, but many great shooters (e.g. Steph Curry, Damian Lillard) usually do not jump very high at all.
The most important thing is to have have your legs move in sync with your arms throughout the shot motion. As your arms are down, your legs are bent. As your arms begin move up, you begin to extend your legs. As you fully extend your shooting arm and release the ball, your legs are also fully extended and at the peak of your jump. It should be one smooth motion.
You will notice that the best shooters are so smooth that it looks like their legs and arms are completely in sync.
The worst shooters have a noticeable hitch as their legs fully extend way before releasing their shot or they release their shot before their legs extend.
Tips, Things to avoid, Common mistakes
Here are some final tips and reminders to remedy common mistakes made when shooting a basketball.
- Use your legs for distance, not your arms — To increase distance on your shot, you need to use more force from your legs, as well as increasing the speed at which you shoot, while still maintaining the same proper form and motion as before. Many players make the mistake of trying to push the ball harder with their arms, or launching the ball from their waist. This screws up your form and is not a good habit to build. Build your range up slowly. Don’t worry if you can’t shoot threes right away. Your shooting muscles and coordination will develop over time to help increase your range.
- Avoid negative motion — Negative motion is when at the top of your shot, your forearm cranks back a little bit more to launch the ball like a catapult. Many players have this problem, including pros. This tends to happen a lot when players try to shoot too far out of their range. Negative motion actually decreases your shot power, as well as accuracy. Avoid this by remembering to always keep your forearm and upper arm locked at a 90 degree angle until you extend to release.
- Your off hand / guide hand is only to support the ball. Avoid the temptation to shoot the ball with two hands. Using one hand helps you build more consistent aim.
- Relax. This is a very important tip that many people forget to talk about. Basketball is as much mental as it is physical. Remember to relax your body and mind when you shoot. If your body is tense, and your mind is stressed, then you won’t be able to shoot. Especially remember to relax your shoulders, as they are usually the first part of your body to tense up when shooting under pressure. You will notice all the greatest shooters (Curry, KD, etc.) look super relaxed when bombing away.
Basic Shooting Drills
These three basic drills will help you practice the fundamentals that we have just learned.
One hand shot
Player needs to stand close to the basket and to hold a ball in one hand. The off hand should be behind the back. Then, without a jump, go through the shooting routine and make a shot
This drill helps you focus on your shooting hand position, and the mechanics of the shooting arm. Because you are not using the off hand, all of the attention is on what the shooting hand is doing.
Mirroring
Take the same position as in the first drill, but this time there is some action with the off hand. In this drill, you are doing a mimic of a real shot, but instead of holding the ball with both hands, the off hand is going the same way but without touching the ball.
Again, player is shooting without taking a jump. This drill is making your body remember witch hand is the leader and which one is there to help.
Around the world
Now that you have got your hands in the right positions, it’s time to practice a full shot motion.
Start on one side of the key, and shoot at 7 different positions around the key until you are on the opposite side that you started from. If the free throw line is too far for you right now, just take a step or two in, until you are at a comfortable range. Don’t worry about distance right now, but instead focus on having proper form.
Use everything we learnt today — hands, arm position, stance, and shot motion. Try to put it all together into one smooth shot. Focus on your form, not on makes/misses for now.
If possible, record yourself shooting, so that you can see if there are any obvious mistakes happening.
Conclusion
This is just the beginning. In later articles, I will look to improve your shooting range (3 pointers!), as well as more advanced techniques like shooting off screens and shooting off the dribble.
What did you think about this guide? Feel free to ask any questions, or add other tips that can help players improve their shooting.


I love what you are doing here not may people talk about eye dominance and I believe that’s a huge thing. I wonder about a few things though.
1) how should our wrist be when we release the ball. What I mean is should the wrist be stiff as you release like MJ or floppy and relaxed like Stephen curry.
2) I noticed you talked about the knees bending and the ball comes down, but I don’t recall you talking about ‘how to load the hips’, do we even load the hips and is it a downwards motion or pushing the butt back.
Hi Jason!
1) In my opinion, the wrist is up to your personal preference. Obviously, MJ and Curry are both amazing shooters, so floppy or stiff both work. You can experiment with both and see which works better for you. The more important thing to focus on is to have a downward flick with the ball coming off the fingertips so that you get enough backspin.
2) Basically, you want all power to come from your butt, hips, and upper legs — not your lower back. So, when you bend your knees, your butt should also stick out to keep you balanced. Make sure to keep your lower back straight, and don’t hunch over too much with your chest and shoulders. Check out this video from Steve Nash who probably explains it a bit better: https://youtu.be/a6SXKULQ-Es?t=40
I have a couple more questions if that’s alright.
1) I have been wondering as to when you stated that you need to put your middle finger or index in the middle of the ball, what do you think is the reason as to why Stephen curry has his shooting hand off center of the ball and somehow still have a straight shot.
2) You also stated how your elbow should be about eye level, I was just wondering where the fingers should end up after release some people say in and through the basket but I don’t know how that possible since the rim isn’t transparent. The reason I’m saying this is because I try to relax my wrist as much as possible (so it bounces all over) , this is the source of the extra power I generate from distance since I’m a low jumper, so I try to aim with my arm instead, I notice that my follow through isn’t consistent(sometimes it goes across my nose) causing side to side misses eventhough I am left eye dominant and have a shot line In the middle of my body, is there a way I can fix this. Thank you and I can’t wait for more of your blog posts.
Hey Jason, thanks for all the questions 🙂
1. You do not NEED to put your index/middle in the middle of the ball. That is just a general guide for beginners to get their shooting hand in an appropriate position. If you find it better for you to have it a little bit to the side — go for it! Of course, you dont want to end up like Joakim Noah, and have a crazy side spin on your shot. Curry’s shooting hand is still pretty much under the ball when he shoots, and he has a straight follow through.
2. Haha, you seem to be overthinking a lot. As you said yourself, your follow through isn’t consistent. So, don’t worry so much about your fingers, and just focus on having your follow through finish in line with the basket. Maybe you need to turn your body a bit more to keep your arm straight, and not coming across your nose.
Thanks for reading my posts! Been very busy recently, but hopefully can write more soon.
My shot has been a lot more consistent thanks to your advices, that other kids in the neighbourhood have asked me to help them be more consistent in their shots as well over the summer (bare in mind I just turned 19 so it’s tough to train others to say the least) .
The issue I’m facing is that one student can’t seem to shoot a 3 to save his life, his mid-range game is fairly good but when we get to the high school line his shot barely goes in. He tends to miss side to side, he complains that he has a lack of control when he’s shooting from 3, I have tried to make him have no pauses in his shot; since, he’s left eye dominant and right handed, like myself, so he brings the ball down the middle of his face and has somewhat of a set point at the bridge of his nose. He has a thumb flick, ( it worked at the midrange I’m anxious to change it) and when he release the ball his elbow covers his right eye so he isn’t always aligned to the basket; thus that’s why I think he has the thumb flick, as compensation, he has a turn of about 10:30 to his shot. In retrospect, I had the same covering of eye issue and I believe made me inconsistent, but the only way I could fix it was by bringing the ball down my right side instead eventhough I’m left eye dominant. I see players like harden have a midline setpoint and make it work, I hope you have any valuable insights like always. Thanks.
To reply to your wrist comment, just do whatever works for you.
I need some wisdom again. Still waiting for you to drop some bangers
Hey Jason, thanks for dropping by so often. What are you struggling with, or looking to improve?
My shot has been a lot more consistent thanks to your advices, that other kids in the neighbourhood have asked me to help them be more consistent in their shots as well over the summer (bare in mind I just turned 19 so it’s tough to train others to say the least) .
The issue I’m facing is that one student can’t seem to shoot a 3 to save his life, his mid-range game is fairly good but when we get to the high school line his shot barely goes in. He tends to miss side to side, he complains that he has a lack of control when he’s shooting from 3, I have tried to make him have no pauses in his shot; since, he’s left eye dominant and right handed, like myself, so he brings the ball down the middle of his face and has somewhat of a set point at the bridge of his nose. He has a thumb flick, ( it worked at the midrange I’m anxious to change it) and when he release the ball his elbow covers his right eye so he isn’t always aligned to the basket; thus that’s why I think he has the thumb flick, as compensation, he has a turn of about 10:30 to his shot. In retrospect, I had the same covering of eye issue and I believe made me inconsistent, but the only way I could fix it was by bringing the ball down my right side instead eventhough I’m left eye dominant. I see players like harden have a midline setpoint and make it work, I hope you have any valuable insights like always. Thanks. Sorry posted it in the wrong reply section.
Hi Jason, glad that I have been of some help to you 🙂
It’s hard to say what the issue is with your student without seeing it myself, but it could just be that he is just not strong enough to be shooting 3s yet. If he is missing side to side, and lacking control on his shot, it sounds that most likely he is just pushing/heaving the ball for more power, instead of “shooting” it.
There is no reason to rush developing a 3 point range if it wrecks their technique/form. I would first start at the free throw line, making sure their shot is good (consistently straight) from there. Then slowly, take one small step back at a time until you find the current limit to their range. Then, it could just be they need to develop a bit more physical strength before taking another step back.
As for the the elbow covering the right eye on his shot — it is quite normal if he is a left eye / right hand shooter (since he is aiming more with his left eye). If you watch a lot of NBA players, one eye is often partially/fully covered when they shoot. Again, it is hard to say exactly without seeing it, but I dont think that is too big of a problem.
Just remember to slowly build up the range, and continue making minor form adjustments until the shot is consistent. Good luck bro!
I have returned for your guidance again.
See I have been taking breaks from ball due to jumper’s knee but I’m working in cath and shoots. However, I have realised that the ball doesn’t seem to go the way I want. I tried index finger, doesn’t feel right it always seems to come off my middle. So I tried middle, that doesn’t seem to give consistency at all. Then I tried split but then with that, when I release the ball I try to point my wrist to the basket my hand is splitting the air valve and is down the middle but it never seems to travel straight. For that reason I Brought the ball to the right side of my face just like klay Thompson it still doesn’t go straight consistently I was feeling tempted to try a thumb flick but I won’t fall for that, I even have a turn and it still doesn’t seem to keep the ball straight, my elbow and hips are pointing to the rim before release. Is there anything that you think can help. Thanks.
Side note : when the ball reaches your setpoint should me knees be locked, how can I improve my ball-hip rhythm?
Hi Jason, sorry for late reply. It’s hard to say exactly what you’re doing wrong without seeing it. But, if you’re trying something brand new, its not going to feel natural at first. Just stick with one method for at least a couple weeks (depends on how much you’re playing), and see how you progress. I would say try index finger first.
If you’re suddenly not shooting straight, there could be a lot of reasons — but just go back to the basics. Start shooting from super close (stand under the basket then take one step back), making sure to bring the ball straight up through your shot line and finishing your follow through. Try to get 5 perfect ‘swishes’ in a row before stepping back further.
Your knees should be locked (or your legs fully extended) when you release the ball. If your knees are locked at your setpoint, it is too early, and you will lose power.
Hope that helps bro!
One more thing. What does it mean have an effortless jumpshot and what are the checklist I should tick to get to that stage.